Category Archives: Uncategorized

Day 43: Giant Inspiration Board

Standard

Supplies: Thin rope, nails, clothes pins, hammer, big empty wall

20110911-084629.jpg

Time: 15 minutes

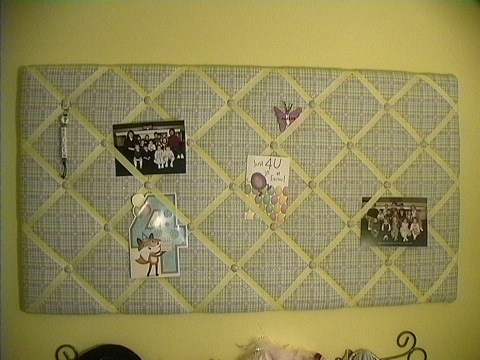
I’m finished moving! Everything is downstairs and ready to be put away. My apartment is kind of like a studio with a partial wall (no door) separating the front living room and back bedroom. Last night I decided to try out putting my bed in the part of the living room where my craft stuff used to be and making the bedroom a craft room. I got my furniture (mostly) in place and decided to make a giant version of this:

20110911-085521.jpg

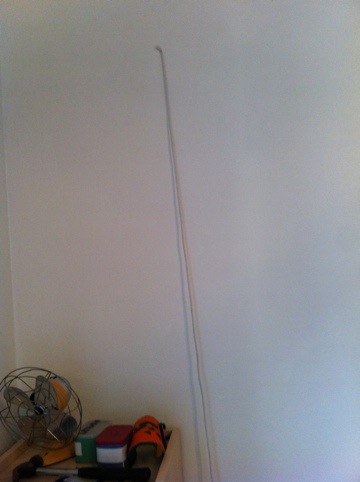
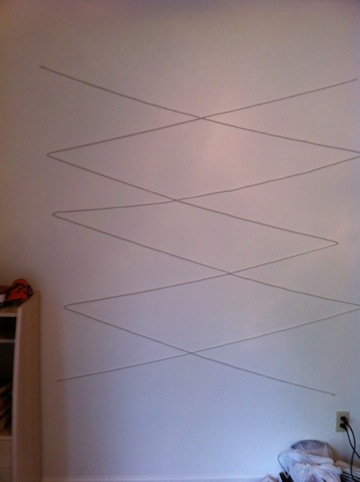
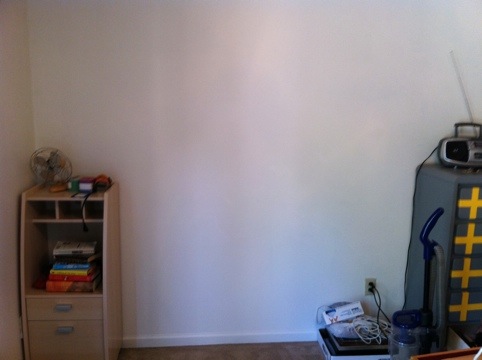
Since I had a nice empty wall I figured it would be the perfect place for an inspiration board. I started by nailing the end of a piece of thin rope to the wall probably 7 feet off the floor.

20110911-085237.jpg

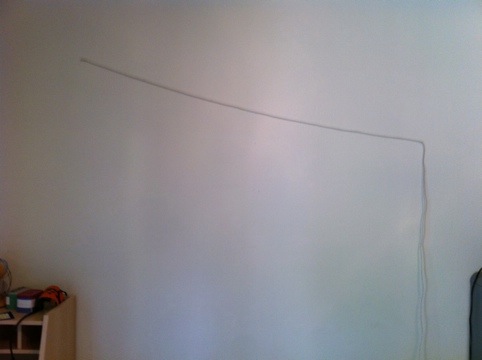
Then I went across the wall and down a little with the rope and nailed that part into the wall.

20110911-085616.jpg

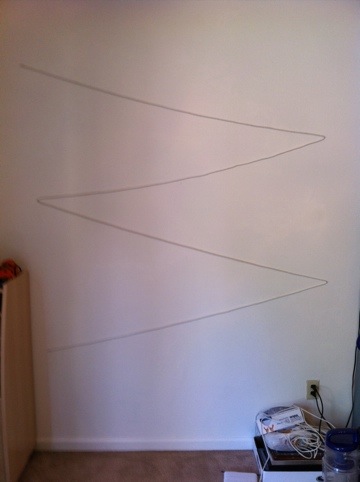
I kept going across the wall until I was a couple feet from the floor.

20110911-085658.jpg

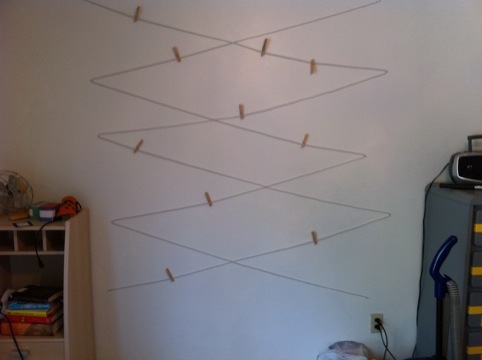
Then I went back the other way to make a lace-up looking thing like this:

20110911-090041.jpg

I covered it with clothes pins…

20110911-090121.jpg

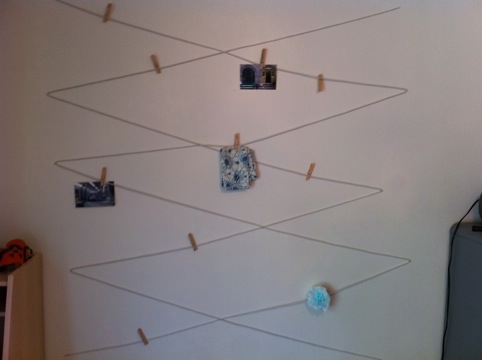
and then added a few things I’ve made and things that inspire me.

20110911-090202.jpg

I’ll keep clipping things on as I unpack and I’m going to make some kind of decoration to put on the corners when I find the materials. I’m excited to start making my wall pretty! You could make this on a smaller scale too using string and a board or something. The ribbons on a ribbon board are actually tight enough that you can slide things under the ribbons to hold them in place, but you can adapt the idea as you like. It’s a nice way to display things!

Best,

Alie

Day 40: Japanese Stab Binding

Standard

Supplies: Thin cardboard, spray adhesive, fabric, sharp nail, hammer, hard surface (that can be damaged), sharp needle, embroidery floss, hot glue (possibly)

Time: 1 hour or so

Right now I’m in the middle of moving from my old smokey apartment to the smoke-free unit downstairs, so today’s craft involved a lot of running back and forth to get the materials I’d already moved.  It’s a bit hectic, so I apologize if the pictures or explanations are weak.  Also, I have no furniture in the apartment that has electricity, so I’m working with a clipboard and a wood Apples to Apples game box…  Anyway, today I thought I’d make a notebook using a method I first learned in sixth grade art class.  I remember really disliking the class in general, but I loved Japanese stab binding.  I was going to make a homemade paper cover for this book, but that’ll have to wait.  For now, you’ll just need some thin cardboard and pretty fabric.

Decide how big you want the book to be and draw two rectangles (or squares) of that size on thin cardboard.  I used an empty graham cracker box.

Cut out the covers using a ruler and an X-acto knife.

Then trace the covers onto a piece of fabric (one for each cover).
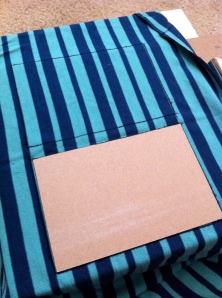
Cut out the fabric, but make it slightly smaller than the lines you drew.  Glue that fabric down using spray adhesive.  You should have about 1/4” of cardboard exposed on each edge under the fabric.  Then cut out two pieces of fabric that are 1/4”-1/2” bigger than the cardboard on each side.

Glue the larger piece of fabric to the back of the cardboard.  Then fold the long edges over, gluing them in place.  I actually ended up using hot glue for this.  You can experiment with this part.  Then fold the shorter ends over, kind of like wrapping a present.  I used hot glue to hold these sides in place too.  Since I used knit fabric my edges were a little ragged looking, so I glued lace ribbon to the edges to cover them up.

Next I grabbed some pages from an old spiral notebook and traced one of the covers on the stack.  Using the ruler and X-acto knife again I cut the stack of paper into a nice little notebook-sized pile.

Now you’re ready to bind the book.
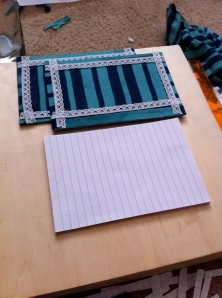
At this point I’m really not sure about the best way to stab the holes for this binding method.  I often like to experiment before I use instructions, so today I’m binding without a net.  I used my horrifyingly large and pointy needle and a hammer, but ended up breaking the needle.  It worked to mark where the holes needed to be, but it didn’t make large enough holes for binding.  At that point I took a nail out of the wall and used that- much better, though still hard to do.

I stabbed four holes along one of the short edges of the book.  Then I threaded a smaller needle with a  little embroidery floss and started binding.  I started at one of the corner holes and wove in and out like so it looked like this on both sides:

Next time I do this I’ll figure out a way to explain exactly how to do the binding, but this is the general idea.  I tied off my thread and was left with a dandy little book.
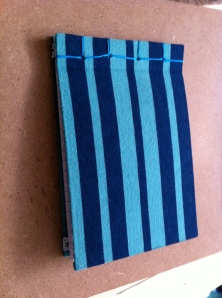
It’ll make a great grocery list notebook or something like that.  Like I said, a better one will come later, but all in all, I’m pretty pleased with my attempt.

Also, I should mention that this fabric came from a dress given to me by my aunt Kim in California.  The dress was a little big and I’m not a good enough seamstress to fix it, so I just used the happy fabric for various things.  I think it’s perfect for a little notebook like this.  Thanks Kim!

~Alie
Day 39: Freezer Paper “Screen” Printing

Standard

Supplies: Freezer paper, printer, X-acto knife, cardboard or cutting mat, iron, fabric paint, t-shirt, paper or cardboard

Time: 30 minutes or more, depending on your design

About a year ago I was working on the Citizen Jane Film Festival, which is run by Stephens College and features films by, for, and about women.  I was taking a practicum class that worked with the festival and lots of staffers came to talk to us.  One of them had screen printed the t-shirts for the fest and that was my first introduction to the idea of screen printing at home.  I couldn’t stop thinking about it for weeks, so I eventually bought the supplies and tried it out.  I had a few failed attempts before I finally got screen printing to work.  It’s time consuming, but pretty darn cool!

So, needless to say, when I saw a tutorial for a simple screen-free, emulsion free, squeegee free way to print shirts at home I was really eager to try it.  Since I had gold ink I decided to get a red shirt and make a Gryffindor shirt for Megan (surprise again, Megan!).

I started by finding a picture, which I cropped and resized.  I don’t know who actually uses freezer paper, but I didn’t know what it was until I read about this project.  It’s kind of like a parchment paper with a waxy coating on one side.  It’s really cool because you can print directly onto the paper side of it!  I didn’t know that at first, so I started tracing the design, but then I realized I could print it, so I did.

Oops! Only took a picture of tracing! It looks like this only darker when you print it.

Side note: Someone just moved out of my building, so I get to move downstairs to a smoke-free apartment!  So I packed up all my clothes and bedding and project supplies and headed to my parents’ house to rid my clothes of the smell before moving them downstairs.  Anyway, my mom has a cutting mat in her sewing room (formerly my room), so I taped the printed freezer paper onto the cutting mat and used my X-acto knife to cut out the red parts.  I cut out the first section and put it on the shirt.  I went over the paper with an iron.  This is the magic part.  Because the top side is paper it doesn’t stick to the iron, but since the other side is wax it sticks to the shirt!

I continued to cut away the yellow sections and iron the red ones onto the shirt.

My finished iron on looked like this:

If I were to do this project over I would have made another thin line around the outside.  Without that line it doesn’t have the detail at the top.  You’ll see on the final product.

I took my gold ink (make sure you have fabric paint!) and a foam brush and painted over the exposed sections.  Don’t forget to put a piece of cardboard or something in the shirt.  If you don’t the ink could bleed through to the back.

When the ink dried I peeled the paper off.  I had to fold the shirt over a bit to get a corner of paper off, but then it peeled right off!

Once everything was peeled off I had a lovely Gryffindor shirt!

And, voila!  New shirt!  I can’t wait to do more of these.  Any suggestions?  By the way, I see a giveaway on the horizon…  Be on the lookout!  I’m off to decide what else to put on a shirt.

~Alie


Day 37: Hands-Free Pin Cushion

Standard


Supplies: Felt cut into two equal circles, a little extra felt in the same color, embroidery floss, needle, stuffing

Time: 30-45 minutes

Today is my first day at my new job!  I get to be an employee at Columbia’s inimitable Shakespeare’s Pizza!  I thought I’d make a little headband/do-rag thing, but it didn’t work out the way I wanted.  I’ll try again another time.

I have to apologize in advance because there aren’t a lot of pictures today.  After one failed crafting attempt I was a little rushed on this one.  I think you’ll be able to get the idea though.  Today’s successful craft is a hands-free pin cushion.

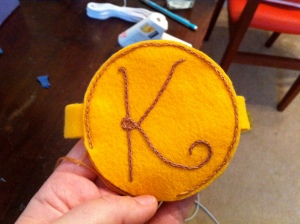
Pick a felt color and trace and cut two circles.  Decide what you want to put on the pin cushion and embroider it!  I did a ‘K’ for my momma.

Cut a long, thin rectangle that fits halfway around your hand or wrist.  Then stitch the two circles together, stitching the edges of the straps in between the two circles.

When the circles are sewn except for about an inch, you’re ready to add stuffing.

Once the pin cushion is stuffed, finish sewing the edges and you’re done!  Stick your pins in the pin cushion and sew up a storm- hopefully with more success than my attempt earlier today.

Happy Labor Day,

Alie


Day 34: Earring Holder

Standard

Supplies: Picture frame (size can vary depending on how many earrings you have), paint, screen to fit in the frame, hot glue or staple gun.

Time: 45 minutes plus a couple hours for paint to dry (if you paint the frame)

When I was in third grade I got my ears pierced for the first time.  I wasn’t too good at taking care of them, so they eventually closed.  When I was 16 I got my ears re-pierced and made a vow to only wear handmade earrings.  The only two exceptions are the original posts and some small gold hoops that used to belong to my mom.  Sometime in college my roommate Katie and I got second piercings, but mine closed when I had to take them out for an x-ray at the dentist.  Anyway, the point of this ear piercing saga is I love earrings.  Some women feel they look their best only if they’re wearing makeup.  I don’t wear makeup, but I feel best when I wear earrings.  I have a great collection that I absolutely love, but I can’t seem to keep my earrings organized.  I’ve been wanting to make an organizer with screen for years and somehow I’m just now getting to it.

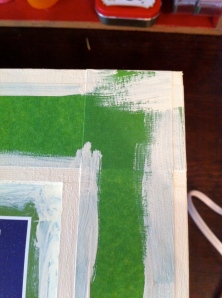
I popped over to Michael’s to get an unfinished wood frame.  I chose unfinished wood just because it was cheap and I wanted to paint it anyway.  You can get any frame you want and decorate it any way you want to make it fit your style.  I did a cream and brown design.  Here’s a quick tip I learned from some show on HGTV.  When you use painter’s tape you’ll often get paint under the edges of the tape.  If you paint the edges of the tape with the base paint color first, it’ll seal the edges and it’ll be nice and crisp!

So, here’s my frame.  That’s really the most time consuming part of the process.

Then all you have to do is attach the screen to the frame.  A staple gun would be ideal if you have one.  Since I don’t have one I decided to try hot glue.  There’s nothing particularly heavy being held in place, so I think it should work.  So far, so good.

Once the screen is secure you’re ready to hang your organizer and hang up your earrings!


Now I don’t have to dig through a bowl with rubber bands in it to find my earrings.  Maybe now I’ll vary my earring selection a little more.  If you make your own earring organizer make sure to leave some extra room!  There will be many earrings to make over then next year!  Enjoy!

And now for the headband giveaway!  The winner of two headbands is…

The lovely Kaitie!  You get two headbands!

Thanks for reading,

Alie

Day 33: Braided Bracelet

Standard

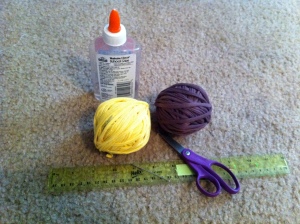
Supplies: Fabric (I used t-shirt yarn) or some kind of cord, ruler, scissors, something to hold the string, tapestry needle

Time: 20 minutes

Today it took me a long time to decide what to make.  I sifted through dozens of project ideas from Craftgawker before finally landing on one I’d bookmarked awhile back.  It’s a braided bracelet tutorial that’s a perfect use for t-shirt yarn if you have it.  It’s a really pretty bracelet, but it makes you feel like you’re 10 again.  It also requires only a couple materials.

I’m going to recommend you check out the original tutorial here in addition to this one.  It has tons of pictures!

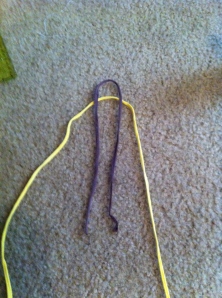
I started with yellow and brown t-shirt yarn.  Yellow is my outside color and brown is inside.  The outside color strand should be 95cm and the inside color strand should be 52cm.  Fold both strands in half and set them up like this:

I used a chair leg to hold the folded end of the brown strand in place.

Now you’ll start braiding.  I’m going to explain with the colors I used just to make things clear.  Remember the yellow strand is the longer one.  Start with the left yellow cord.  Fold it over the left brown cord and under the right brown cord.

Sorry it's sideways. It wouldn't let me rotate it...

Then fold the right yellow strand over the right brown cord and under the left brown cord.

I guess these are going to be sideways 😦

Pull it tight and you’ll have something that looks like this:

Keep braiding until you have about an inch or so of yellow left on each side.

This is actually before I finished braiding.

Weave the yellow ends under the yellow loops.

Snip off any extra that sticks out.  Then you’ll tie a knot in each loose end of the brown.  I don’t know what kind of knot it is, but the tutorial calls it an overhand knot.

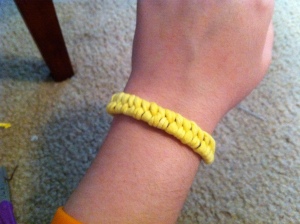
And your bracelet is done!  It’s actually kind of hard to put on alone, but you just lace one brown end through the brown loop and tie the two loose ends in a double knot.

When I get paid tomorrow I’m going to buy some colored cord and make one of these for my friend Megan.  (Surprise!  I’ll have it for you next time I see you!)

Have fun with these- I promise you will!

~Alie
Day 30: Daily Calendar/Journal

Standard

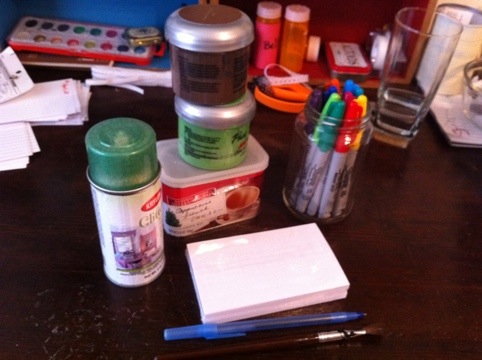
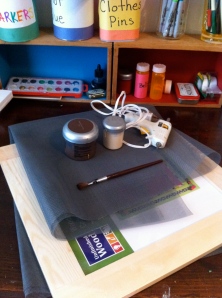
Supplies: Index cards, small box that will fit 183 index cards, paint, markers, other decorating supplies.

20110829-060837.jpg

Time: At least 1 hour

I’ve always tried to keep a journal. I try and then stop and then start back up again. Somehow, my desire for perfect writing and pristine notebooks just killed my journal writing dreams.

Then about a year ago a read about a very simple kind of journal that serves it’s purpose, but doesn’t require a lot of insight.  I know that might sound contradictory to the whole point of keeping a journal, but that’s what I want from it.  So basically this journal involves an index card for each day of the year, but years are not written on the cards.  Each day you find the card for that day, write the current year on it, and write a short sentence about what you did. In several years you’ll have a concise little “this day in history” for your life.  So here’s one way to make your daily journal.

Start with the cards.  You’ll need 183 or 366 index cards.  If you want to have one index card for each day you’ll need 366 (don’t forget a card for leap day!), but you can also use both sides of each card and only 183 cards.

The original idea for this project (I can’t remember where I read about it) suggested using a date stamp, but those are a bit too expensive for me.  Instead, I whipped out my pretty colored Sharpies!  Start writing or stamping the date on each card.  When you get halfway through, flip the cards over and turn the stack 180º.


Now, moving on to the container!  I have a few old cans from fancy coffees my grandma gets and they’re the perfect size.  All you need is something that fits the cards.  I painted my can with a little vine pattern.

My brother recently gave me a collection of craft supplies he had sitting around.  One of the things in the collection was spray glitter!  For the sole reason that I’d never used spray glitter before I decided to add some.  And it’s green!

The nice thing about this project is you can use whatever supplies you have on hand and do anything you want.  Go crazy!  When everything is finished you just need to put the index cards in the container and start journaling!  Get to it!

Back tomorrow,

Alie

Day 28: Egg Notes

Standard

Supplies: Eggs, push pin, nail, paper, egg dye/paint/permanent markers, bowl

Time: 10 minutes to make, several hours-overnight to dry

Once during college I checked out a book at the library and found a lovely picture and uplifting note inside. It brightened my day to see a nice little touch of optimism in an unexpected place. When I returned the book I put the note back for the next person. I recently saw a picture of invitations made with empty eggs and I thought it might be fun to pass on a little happiness in another unexpected way.

I started with two eggs (that would also serve as my lunch). I used a push pin to poke a small hole in each end of both eggs. Then I used a tapestry needle (only because I didn’t have a nail) to make the hole slightly larger. Do use a nail if you have one, but I found that you can be pretty creative with your hole-boring tools and it’ll still work. Just be gentle or you might get a much bigger hole than you want!

When you have two holes in one egg wipe it off with a wet towel and blow on one end so all the egg comes out the other end. It might take a little while and you might have to make the holes slightly bigger as you go. Take a break if you need to- you’ll probably feel a tad light-headed at some point. Once all of the egg is out of the shell you’ll want to run it under some water to clean it out as much as possible. Try to get water inside the shell, block the holes and swish the water around, and shake the water out. You’ll be left with some nice empty egg shells and the insides, all ready to scramble.

Dry the outsides with a towel and set the eggs aside so the insides can dry out. Meanwhile, cook up some scrambled eggs!

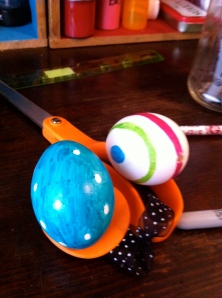
If you’re feeling a bit impatient (like me) you can go at the egg shells with a hair drier or something like that. It helped the drying process along a little (I think). If I make more of these I think I’ll empty the eggs at night and let them dry until morning. Once the eggs finally dry you’ll probably want to make them pretty. I used permanent marker, but you can use paint or egg dye or anything else that will look good. If you do use dye I would recommend doing that before poking holes or before drying the eggs, for obvious reasons. My eggs looked like this:

I cut a couple strips of paper and wrote nice little messages on them, also in pretty permanent marker colors.

I rolled each note into a tiny scroll and stuck one in each egg shell.

When the notes were inside I added a little instruction on the outside of each egg. Then they were ready to be hidden somewhere in town.

I stashed the eggs in somewhat hidden places on my way to work. If you live in Columbia, keep your eyes open for them! Also be on the lookout for a special second batch of these when fall comes…

Thanks for reading,

Alie
Ps- here’s a bonus picture for you! My dad sent me a link to this idea.

Ahhhh! Charge your phone!!!

Day 23: Felt ABC Book (Etsy Day!)

Standard

Supplies: Felt, fabric scissors, ruler, pen, needle, embroidery thread, hot glue

Time: Quite a bit… longer than I expected!

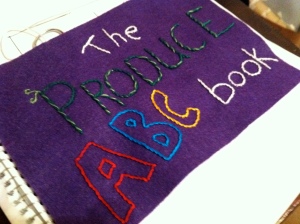
I did it!  I finished my Etsy project mere moments ago.  I almost didn’t make the Monday deadline, but here it is!  Today’s Etsy project is similar to last week’s in that it is also felt and for kids.  Today it’s a felt alphabet book.  I’ve always loved science even though the math involved made it tough for me in school.  Now I like to incorporate images and concepts from science into my creative endeavors.  For this project I took a very simple scientific inspiration and made an alphabet book themed around produce.  It was a tough one to photograph, but I’ll do my best to explain it.

I started by planning out my book.  I figured out how many letters I wanted on each page, how I wanted to arrange them and got enough felt to make my pages.  After I figured out how to lay out the pages I found a rectangular object that I could trace (yay tracing!) to make them.  I grabbed the box for “The Princess Bride” DVD!  I traced all the pages…

and cut them out.  Then I drew each letter on a piece of felt that would stand out against the page it would go on.

I cut out each letter and hit the internet to find a fruit or vegetable for each letter.  Then I embroidered the words onto their corresponding letters.  That’s the part that took awhile…

Q is for quince- apparently it's kind of apple/pear-like

Once all those letters were done I spread them out on the pages and glued them in place.  I made sure to keep a little free space on one side of each page for the binding.

Then I embroidered a cover for the book.

Since the back of the embroidery work shows on this page I made another rectangle and glued it to the back.  Then I cut out the binding from that same inside-the-front-page felt color.  I used the DVD box again to make sure the size was right.  I glued the front part first:

This looks nuts because I had to take it upside down for lighting's sake

Then I glued the side and the back and that’s that!  Done!

I hope it was worth the several days it took.  You’ll be able to check out the listing on Etsy tomorrow evening here.

Thanks for reading,

Alie
Day 21: DIY Cat Toys

Standard

Supplies: Felt, fabric scissors, needle/embroidery thread, stuffing, small jingle bell, cat nip (optional)

Time: 15 minutes per mouse

Remember yesterday when I said Etsy day would be today?  I lied.  The project it taking longer than I expected, but I expect to get it done tomorrow or Monday.  In the mean time, I thought I’d show you how to make a really easy cat toy.  When I got Daphne last December I wanted to give her some toys, but I was absolutely not interested in spending $4 on a single catnip mouse.  So I figured I could make cat toys for almost no money.  And did I ever!  So much cheaper!  A sheet of felt costs under 50 cents and you can get 10-12 mice out of a sheet.  The rest of the supplies don’t cost much more and each mouse comes out to less than a dollar.  And they’re easy!  So here we go…

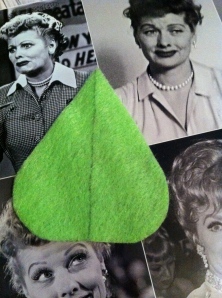
Grab a piece of felt and draw half of a teardrop on the felt.

Fold the felt at the edges of the teardrop and cut it out so both sides are the same.  If you’re going to make many of these I would recommend making a cardboard teardrop template to trace.  Your cut out mouse should look something like this:

Now whip out some pretty contrasting thread and embroider eyes and ears on your mousey.

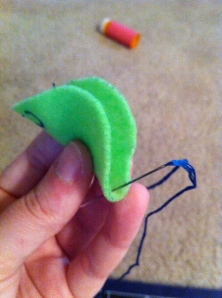
Fold the mouse in half and thread your needle with more contrasting thread.  Starting at the bottom of the mouse…

sew the two sides together until you get to the ear area.  You need it to be open enough to shove some stuffing in there.

The cat's having trouble waiting

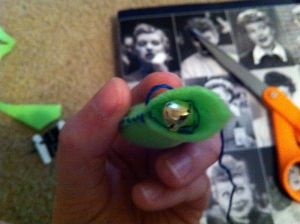
At this point, stuff half of the mouse and put the bell inside.  Daphne’s entertained by the bell alone, so I don’t put catnip inside, but if you want to add it do that now.

Then stuff the rest of the mouse and sew it up to the nose.

When you get to the tip of the nose tie a knot to serve as the actual nose.  Then shove the needle through the tip of the nose and out the very end where you want the tail to go.  You don’t want your mouse’s tail to come off or the cat will probably eat it, which is not good!  By making the seams, nose, and tail all one strand you make it safe for your cat.  The tail’s not going to fall off and wind up in your cat’s intestines (ew!)

Sometimes it’s pretty hard to get the needle through the mouse.  If that happens you can use pliers or possibly some strong tweezers to yank it through the felt.  Cut the tail so it’s a couple inches long and toss it to your cat!

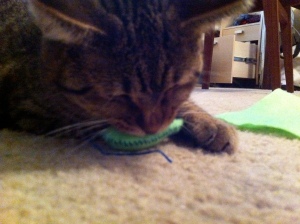
Daphne has several of these, but she was more than happy to play with a new mouse.  That’s her paw on the right side over there.

Have a great Saturday!

Alie